Using and implementing techniques for Privacy and Anonymity
Currently still under Construction
Introduction
GrapheneOS
Signal app
Session app
SSH Tunnelling (Linux & Windows)
Introduction
The following information will assist anyone who needs help with obtaining more digital privacy. The following security techniques that will be in this guide include: using OpenVPN, configuring OpenVPN server on Pfsense for secure remote access to one’s home network, using SSH tunnelling, privacy apps, GrapheneOS and connecting to the TOR network.
Setting up GrapheneOS
For a guide to installing GrapheneOS, it is better to link you to the OFFICIAL GrapheneOS website tutorial.
CLICK HERE FOR THATBelow is a video on how to install GrapheneOS as well
You will also need to install the F-Droid app and the Aurora Store app. These are the privacy replacements for the Google Play Store.
The Aurora store is an anomymising front for the google play store.
Below is a video on how to install them.
Setting up the Signal App
Until our full guide is ready, check out this video guide from Guilding Tech.
Setting up the Session App
Until our full guide is ready, check out this video guide from Session.
SSH Tunneling with Terminal (Linux)
First we'll start with Terminal in Linux.
1. Open a Terminal.
2. Make the SSH connection.
|
Syntax: ssh -CTNv -p [port] [user]@[hostname or ip address] -D [port to forward] Example: ssh -CTN -p 443 jeff@my-remote-host.org -D 5000 |
|
The "-CTN" options are:
|

3. Next, we see that SSH has printed what its doing to the screen and is now asking for a password. Type your password for the ssh account on the server here.

4. Now we see that the password has been accepted and the SSH tunnel is now set up and running.

5. Now we need to change the Proxy settings in Firefox.
From the menu bar choose Edit > Preferences. Select the Network tab, then click the Settings button.
Select the Manual proxy configuration radio button and in the SOCKS Host box type: "127.0.0.1" Then in the Port box type: "5000" (the port you chose with the "-D" option in Step 2)
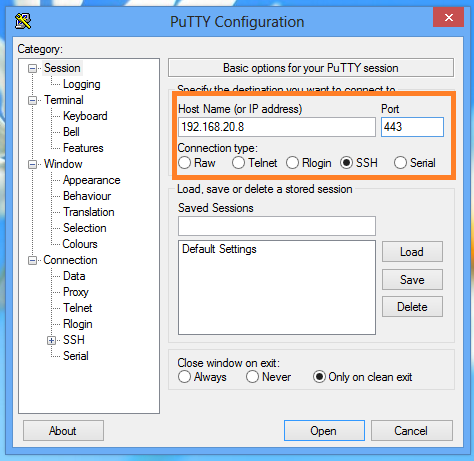
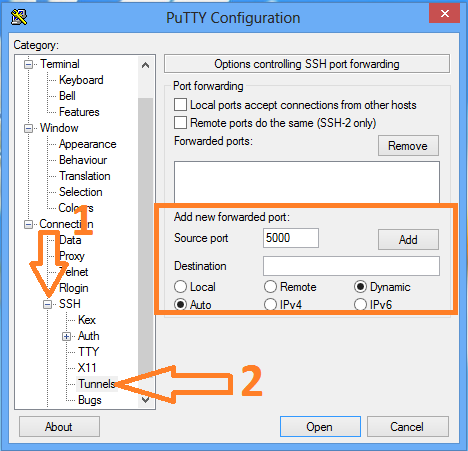
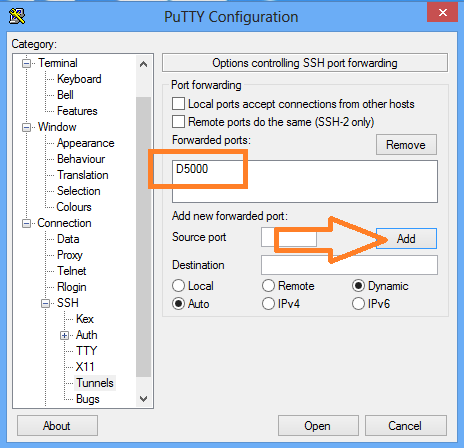
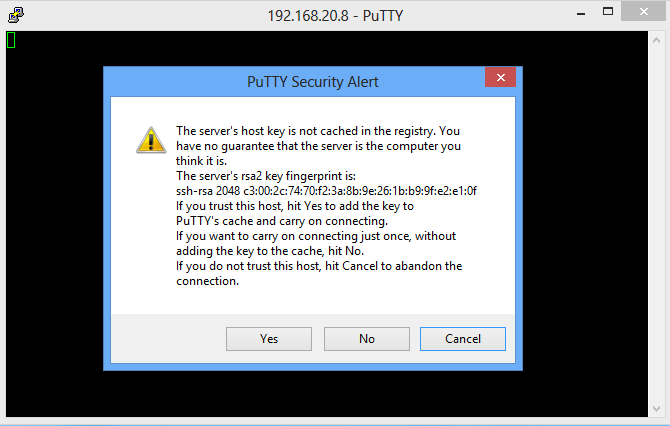
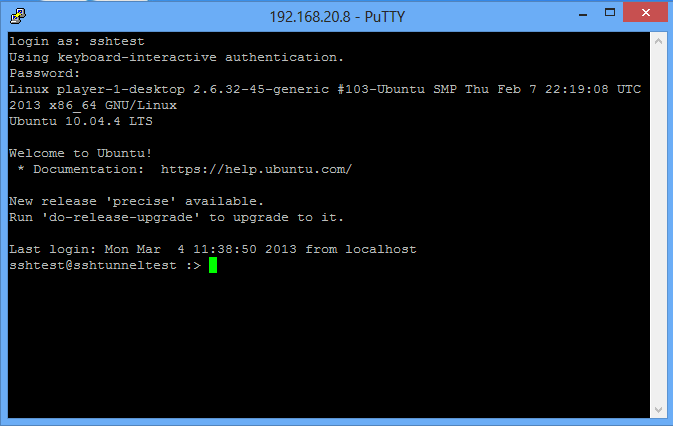
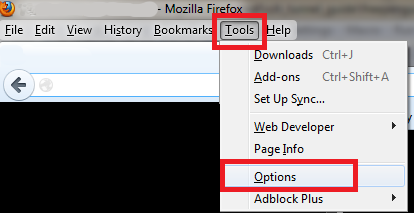
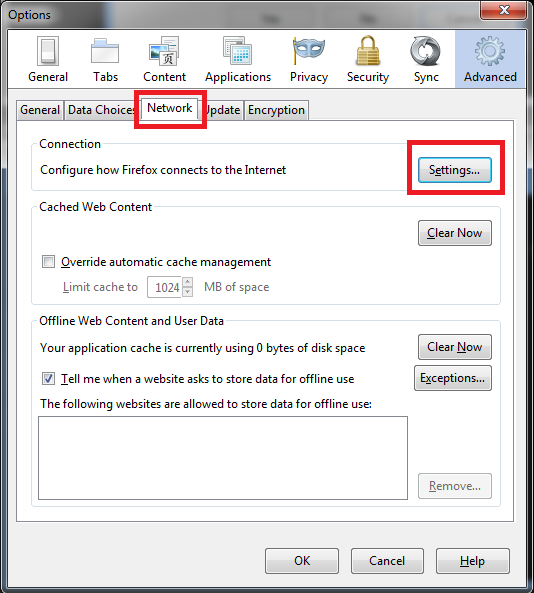
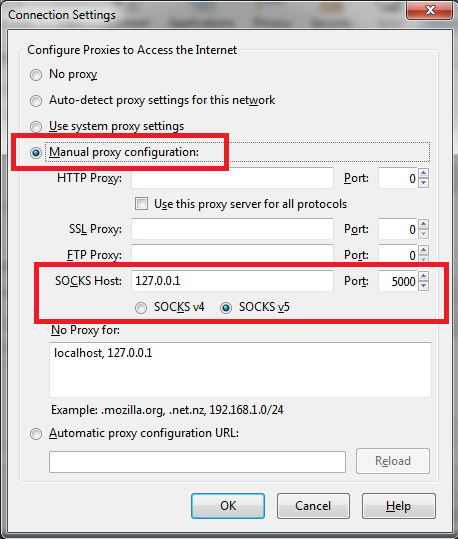
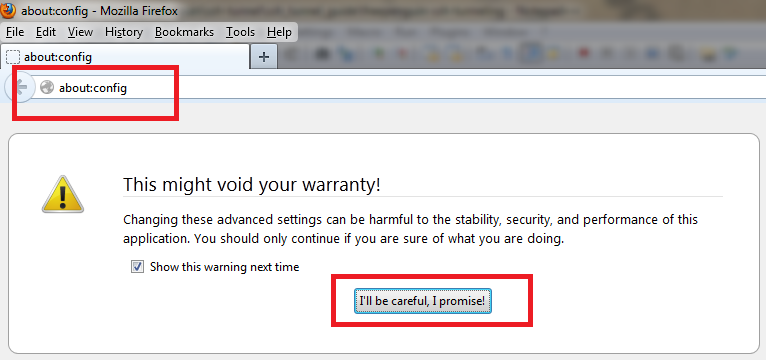
6. The next step is to make sure that your DNS queries will go through the SSH tunnel rather than bypassing it. In the browser Address bar, type: about:config and click on the I'll be careful, I promise button to continue. In the search field type: DNS and look for network.proxy.socks_remote_dns and set this value to true. Finally, Go to a website such as whatismyip.com or dnsleaktest.com and see that your IP address is now the IP address of the server that you are tunneling through. If your IP address has not changed, go through the steps again to make sure you have set the browser proxy settings correctly. For this we will use the Putty client on Windows. 1. Open Putty 2. Enter the remote servers' IP address or Hostname in the Hostname (or IP address) field, then enter the port number in the Port field. 3. In the left pane click the Plus sign next to SSH and then click Tunnels. Enter the local port that you want to use in order to send traffic through this tunnel in the Source Port field. Then select the Dynamic radio button. Now click on the Add button. Notice that the port 5000 is now listed in the Forwarded Ports box with a D for Dynamic. 4. Now click the Open button to start the connection. If this is the first time you're connecting to a specific server, you will see the following diaglog box. Click yes to accept. You will be prompted for a Username and Password. After you enter them successfully, the session and tunnel will be open. Now we need to set the Proxy settings on the web browser. In this case: Firefox! Open Firefox and go to the Tools menu. Select Options. Select the Network tab and then click the Settings button. Select the Manul proxy configuration radion button. Then in the SOCKS Host field type: 127.0.0.1 and in the Port field, type the port number that we used earlier for the tunnel: 5000. Then click OK. In the Address Bar go to about:config, then click the I'll be careful, I promise! button to continue. Now in the Search field, type: DNS. Look under the Preference Name column for network.proxy.socks_remote_dns and change it to true.
Finally, go to a website such as whatismyip.com or dnsleaktest.com and check if your IP address has changed. If it has....Hooray! it worked! You have successfully tunneled your internet traffic through an SSH Tunnel. If it hasn't changed, then you may need to go over some of the steps again to make sure they are correct.


SSH Tunneling with Putty (Windows)
